
KDMA / FIRMWARE UPDATE GUIDE
固件更新教程Firmware update guide
仅适用于 KDMA 官方板卡。确认独立指纹标识与型号适配后,按步骤更新 TX 主机端或 RX 副机端。For KDMA official boards only. Confirm the individual fingerprint identifier and model compatibility, then follow the steps for your TX or RX board.
只烧固件,密钥留空。Firmware only. Leave the key empty.
板卡已有配套密钥,本次更新直接使用;不需要选择“固件+密钥”。Your board already has the matching key. This update uses it directly; Firmware + key is not required.
- 烧录模式Programming mode
- 只烧固件 / 保留已有密钥Firmware only / Keep existing key
- 密钥文件 .nkyKey file .nky
- 留空Leave empty
下载对应文件Download the matching files
先下载官方烧录器与对应端的固件。TX 主机端使用「k板全息tx端 主机端.bin」,RX 副机端使用「rx端 副机端.bin」。分别烧录对应板卡,不要混用。Download the official programmer and the matching BIN: “k板全息tx端 主机端.bin” for the TX host board, “rx端 副机端.bin” for the RX secondary board. Flash each file to its matching board.
连接板卡与下载器Connect the board and programmer
按板卡配套接线方式连接 JTAG 下载器与电脑 USB,确认目标板卡已稳定供电。需要插拔或调整板卡时先断电。一个下载器连接一块待更新板卡,确认接口方向。Connect the JTAG adapter to the board and computer USB according to the supplied wiring instructions. Power the target board steadily. Power off before inserting or adjusting a board, and confirm connector orientation.
打开烧录器,检测板卡Open the programmer and detect the board
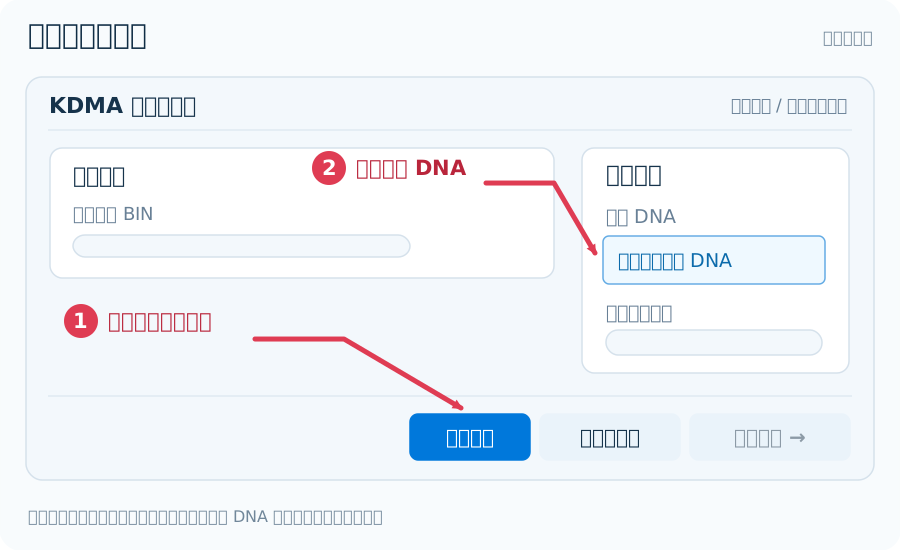
打开下载的 EXE;首次启动等待组件准备完成。点击「检测板卡」,核对目标设备与板卡 DNA。只有一个下载器时,「下载器序列号」可留空;多个下载器时明确选择对应设备。未识别时,从「驱动与帮助」检查下载器驱动及接线。Open the downloaded EXE and allow first-launch component preparation to finish. Click “检测板卡” (Detect board) and check the device and DNA. Leave the adapter serial empty for a single adapter; select the correct one when several are attached. Use “驱动与帮助” (Drivers and help) if detection fails.
 点击放大 ↗Open full size ↗
① 点击窗口底部「检测板卡」。② 核对右侧「板卡 DNA」。单个下载器可留空序列号。1. Click 检测板卡 (Detect board) in the bottom toolbar. 2. Check 板卡 DNA on the right. One adapter needs no serial number. 选「只烧固件」,密钥留空Choose Firmware only; leave the key empty
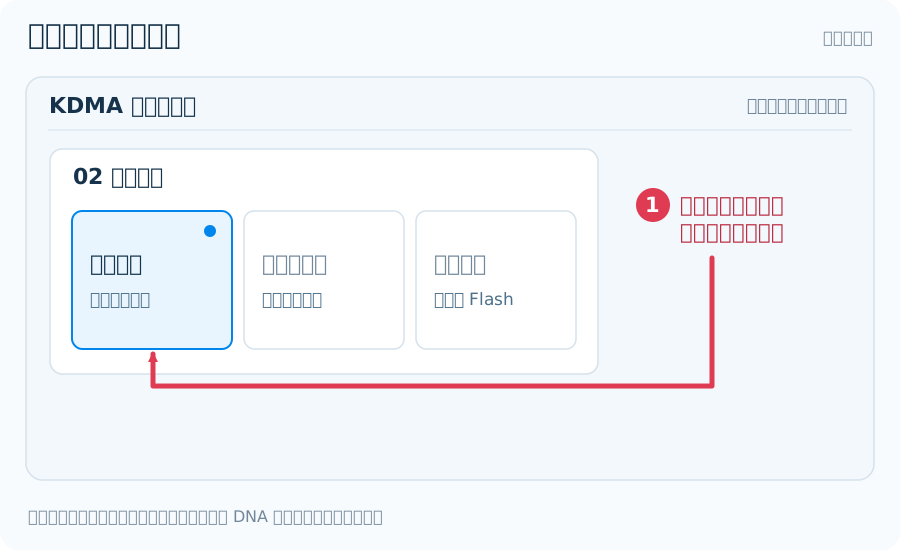
在「烧录模式」选择「只烧固件 / 保留已有密钥」。在「固件文件」选择对应 BIN;「密钥文件 .nky」保持为空。KDMA 官方板卡已完成出厂配置,更新时使用「只烧固件」模式,保持现有配置。Select “只烧固件 / 保留已有密钥” (Firmware only / Keep existing key). Choose the matching BIN in the firmware field and leave “密钥文件 .nky” empty. KDMA official boards are configured at the factory. Use Firmware only to retain the existing configuration.
 点击放大 ↗Open full size ↗
点击左侧「只烧固件」卡片,确认副标题为「保留已有密钥」,选中后卡片显示蓝色。Select 只烧固件 (Firmware only), with the subtitle 保留已有密钥 (Keep existing key). The selected card is blue. 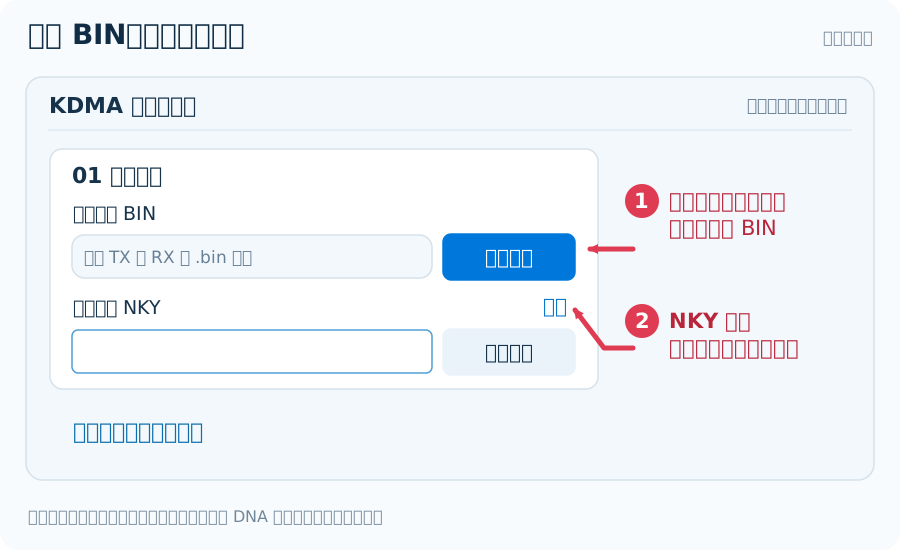 点击放大 ↗Open full size ↗
① 点击「固件文件 BIN」右侧的「选择文件」,选择对应端的固件。②「密钥文件 NKY」保持空白;若已有文件路径,点击该行右上方「清除」。1. Use the upper 选择文件 (Choose file) button for your board’s BIN. 2. Leave 密钥文件 NKY empty; click 清除 (Clear) if a path is already present. 检测与验证后开始烧录Check and verify, then start
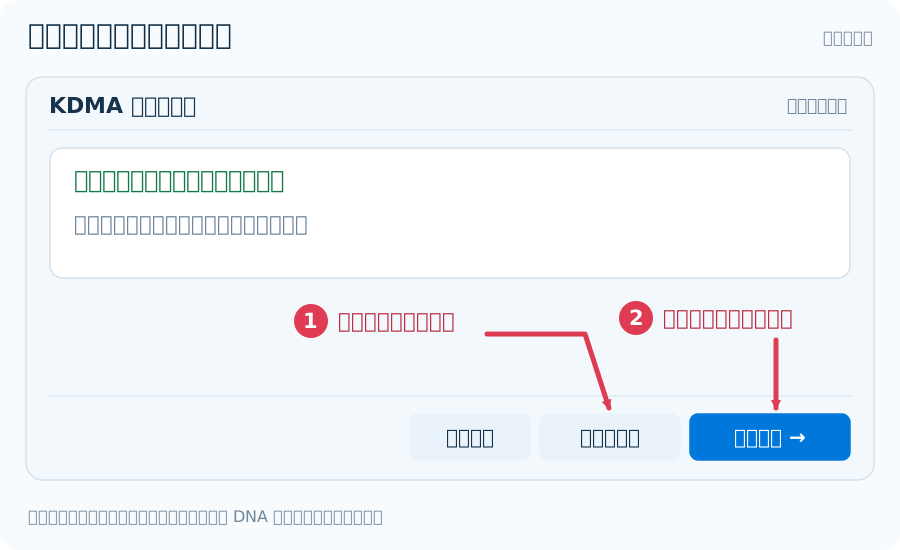
点击「检测与验证」。通过后点击「开始烧录」,在确认窗口再次核对板卡 DNA 与固件文件名。更换文件、模式或板卡后,需要重新检测。Click “检测与验证” (Check and verify). Once it passes, click “开始烧录” (Start programming) and confirm the board DNA and firmware filename. Run detection again after changing the file, mode or board.
 点击放大 ↗Open full size ↗
① 点击「检测与验证」并等待通过。② 再点击「开始烧录 →」。更换板卡、BIN、模式或密钥文件后,要重新检测。1. Click 检测与验证 (Check and verify) and wait for success. 2. Click 开始烧录 (Start programming). Repeat checks after changing the board, file or mode. 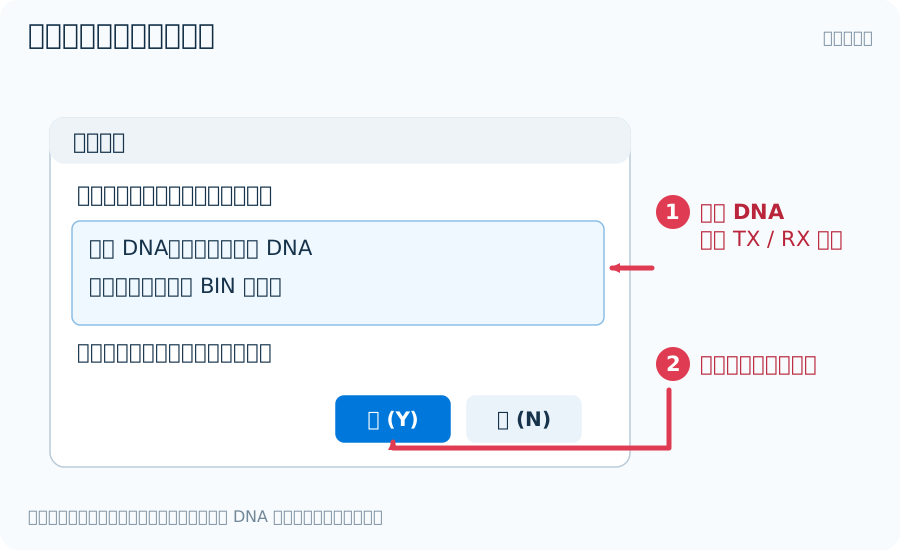 点击放大 ↗Open full size ↗
① 核对确认窗口的板卡 DNA 和固件文件名,确认 TX / RX 对应正确。② 无误后点击「是 / Yes」。按钮文字可能随 Windows 语言变化。1. Check the board DNA and selected TX / RX filename in 确认执行. 2. Click Yes. Native dialog labels follow the Windows language. 等待完整校验与完成提示Wait for verification and completion
烧录期间保持电源、USB 与 JTAG 连接稳定。按软件显示的高速或兼容模式执行,等待备份、擦写、回读校验及启动验证完成;以最终成功提示为准。出现错误时保存日志和提示,不要切换到写密钥模式处理。Keep power, USB and JTAG connected. Follow the displayed fast or compatibility mode and wait for backup, writing, readback and startup verification to finish. Rely on the final success message. Save logs if an error appears; do not switch to key-programming mode to resolve it.
 点击放大 ↗Open full size ↗
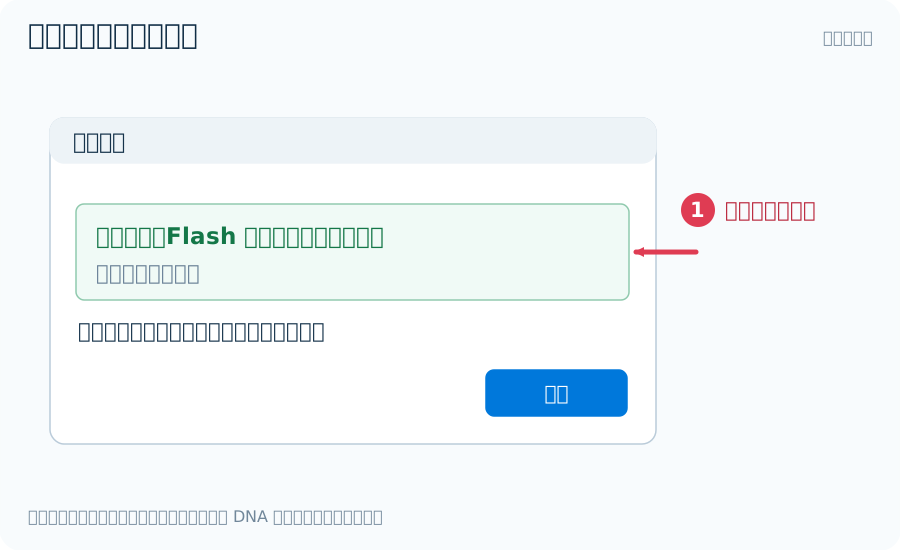
以「操作成功」及「固件写入、Flash 校验和启动验证均通过」为准。保持供电与连接,等待整个流程结束;成功后再按配套供电方式断电、换板或重启。Wait for 操作成功 and confirmation that writing, Flash verification and startup verification all passed. Keep power and connections stable until completion; then power off before swapping boards or restarting. 更新另一端并检查连接Update the other board and check the connection
如需两端更新,在当前板卡烧录成功后,按配套供电方式断电,再连接另一块板卡,选择另一端对应固件重复以上步骤。完成后按正常使用方式重新上电,检查主副机识别、两板握手、测速和读写状态。If updating both ends, finish the first board, power it down according to its wiring instructions, then connect the second board and repeat with its matching firmware. Restore normal connections and power, then check device detection, the board handshake, speed tests and read/write operation.
更新完成后,检查这三项After updating, check these three things
- 烧录器显示最终成功,回读校验及启动验证通过。The programmer reports final success, with readback and startup verification passed.
- 主副机正常识别,两块板卡完成握手连接。Both PCs detect their devices and the boards complete the handshake.
- 运行检测与测速,确认读写正常。Run detection and speed tests, and confirm read/write operation.
常见问题Common questions
需要选“固件+密钥”吗?Should I choose Firmware + key?
不需要。客户板卡已有配套密钥,本教程使用“只烧固件”;密钥文件留空,不进行 eFUSE 密钥写入。No. Customer boards already have matching keys. Use Firmware only with the key field empty; do not program eFUSE keys.
“开始烧录”不可点怎么办?Why is Start programming unavailable?
先检查 BIN 文件及“只烧固件”模式,再执行“检测与验证”。改变文件、模式或板卡后重新检测,并处理软件显示的连接或文件错误。Check the BIN and Firmware only mode, then run Check and verify. Repeat detection after a change and resolve any reported connection or file errors.
写入成功,但板卡无法正常使用?Programming succeeded but the board does not work?
核对 TX / RX 文件与板卡是否对应,确认完整校验和启动验证均成功,再检查供电、主副机接线及驱动。保留烧录日志、板卡型号、固件文件名和错误提示,联系官方支持。Check the TX / RX pairing, confirm readback and startup verification succeeded, then check power, connections and drivers. Keep the log, board model, firmware filename and error details for official support.
提速后需要多久?How long does the faster mode take?
保留组合高速通道、0%–100% 整体进度、阶段百分比、完成容量及耗时显示。具体耗时取决于下载器、板卡及固件变化范围。Retains the combined fast path, 0–100% overall progress, per-stage progress, completed bytes and elapsed time. Duration depends on the adapter, board and amount of changed data.
本次更新提供离线流程、故障中止、界面与安装包完整性检查记录;烧录时间随下载器、板卡和数据变化范围而变化。其他下载器按软件提示使用兼容模式。This release includes offline workflow, failure-stop, UI and package-integrity check records. Flashing time varies with the adapter, board and amount of changed data. Use compatibility mode when prompted for other adapters.